

This guide will walk you through the process of installing PVC trim and moulding like a pro.
1. How to Install PVC Trim and Moulding? A Step-by-Step Guide
PVC trim and moulding have become popular alternatives to traditional wood due to their durability, moisture resistance, and low maintenance. Ideal for bathrooms, kitchens, exterior facades, and other high-humidity areas, PVC is rot-proof, insect-resistant, and easy to customize.
Tools and Materials You’ll Need
Before starting, gather these essentials:
- PVC trim boards or moulding
- Tape measure and pencil
- Miter saw or handsaw with a miter box
- Sandpaper (120–220 grit) or a power sander
- Construction adhesive (optional)
- PVC-rated nails, screws, or a pneumatic nail gun
- Caulk and caulking gun
- Silicone sealant (for outdoor/exterior use)
- Paint and primer (if painting)
- Safety goggles and gloves
Step 1: Measure and Plan
- Measure the installation area carefully. For corners, note whether they’re inside or outside corners.
- Plan joints and seams: Avoid placing seams in highly visible areas. For longer walls, stagger joints for a cleaner look.
- Sketch a layout to visualize how pieces will fit together, especially around windows, doors, or complex angles.
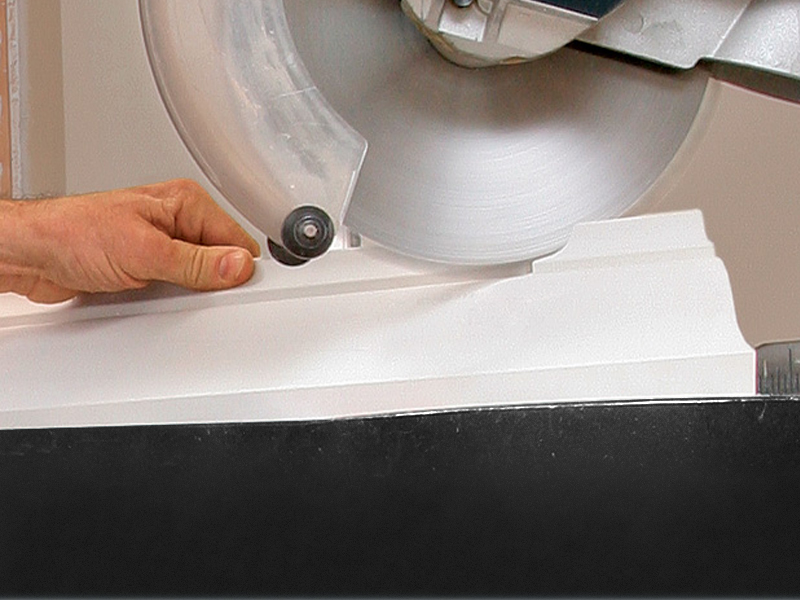
Step 2: Cut the PVC Trim
- Use a miter saw for precise angled cuts. For basic 90° corners, cut two pieces at 45° angles to form a tight joint.
- Inside corners: Cut both pieces at 45° with the longer edge facing the wall.
- Outside corners: Cut at 45° with the shorter edge against the wall.
- Test-fit all pieces before securing them. Trim with sandpaper if adjustments are needed.
Pro Tip: PVC cuts smoothly, but go slowly to avoid melting the material from friction.
Step 3: Install the Trim
- Dry-fit the pieces to ensure alignment. Mark nail/screw positions.
- Secure the trim:
- Use PVC-rated nails or screws every 12–16 inches. For extra hold, apply construction adhesive to the back.
- Nail placement: Drive nails near the edges, but avoid splitting the material. Sink nail heads slightly below the surface.
3. Work from one corner to another to maintain consistency.
Step 4: Fill Seams and Gaps
- Apply paintable PVC caulk to seams, nail holes, and small gaps. Smooth with a damp finger or tool.
- Sand lightly once the caulk dries to ensure a flawless surface.
Note: For exterior installations, seal edges with silicone sealant to prevent water infiltration.
Step 5: Paint (Optional)
While PVC trim often comes in white, you can paint it to match your decor:
- Clean the surface with a mild detergent and let it dry.
- Use a PVC-compatible primer to ensure paint adhesion.
- Apply acrylic latex paint with a brush, roller, or sprayer.

Maintenance Tips
- Wipe with soapy water to clean; avoid abrasive cleaners.
- Inspect caulk and sealant annually for cracks, especially outdoors.
- Repaint as needed to maintain appearance.
Why Choose PVC Over Wood?
No rot or warping: Perfect for wet environments.
No painting required (unless desired).
Lightweight and easy to cut.
Final Thoughts
Installing PVC trim and moulding is a beginner-friendly project that elevates your home’s aesthetics while offering long-term durability. By following these steps and prioritizing precise measurements and sealing, you’ll achieve a professional finish. Whether upgrading baseboards, crown moulding, or exterior fascia, PVC is a practical and stylish choice.
Safety First: Wear protective gear when cutting or sanding, and work in a well-ventilated area.
With patience and attention to detail, your PVC installation will look seamless for years to come! 🛠️


